Vacuum Sealers ◆ Guide
How to Vacuum Seal Wet Meat Without Failed Seals
Blood and juice in the seal line cause most failed seals on processing day. The sealer manuals agree on the fix, and it starts before the bag goes in the machine.
We earn a commission if you buy through our links, at no extra cost to you. It never decides the ranking — the method is published · Affiliate disclosure
To vacuum seal wet meat, seal it cold and keep liquid out of the seal line. Pat the surface dry instead of rinsing, pre-freeze the portions for 1-2 hours so the juice firms up (the FoodSaver and Weston manuals' advice), or fold a paper towel between the meat and the seal area. Use your sealer's moist or liquid mode, or hit Seal early. For truly wet trim, a chamber sealer.
That's the short version, and it's the same advice every sealer manual we read gives in slightly different words. The rest of this page is the why, the step-by-step, and what the different sealer modes actually do, because a sealer that pulls blood into the seal bar leaks, and one that pulls it into the pump may not come back.
Why wet meat breaks seals
An external (suction) sealer pulls air out through the open mouth of the bag. Liquid in the bag rides that airflow toward the seal bar, and a heat seal made through a film of blood or fat doesn't fuse cleanly. NESCO's VS-12 guide says it directly: wet bags may be difficult to seal, and leaks along the seal come from wrinkles, crumbs, grease or liquid. The Avid Armor chamber sealer manual's troubleshooting page says the same thing from the other side: if a bag won't seal, check the seal area for liquid or moisture, clean and dry it, and try again.
The second risk is to the machine. NESCO warns that small amounts of liquid pulled into the vacuum chamber can clog the pump and damage the appliance. Weston's Pro-2300 manual says not to let liquids be sucked into the vacuum port or damage may occur, and to use its Manual Seal button for liquids. FoodSaver builds a removable drip tray into the V4400 for exactly this, and the unit turns itself off when the tray fills.
Should you seal deer meat wet or dry?
As dry on the surface as you can get it, and cold. Don't rinse it first: in its freezing guidance, USDA's Food Safety and Inspection Service notes it isn't necessary to rinse meat before packaging it for the freezer (FSIS, Freezing and Food Safety). Rinsing just adds the water you're trying to keep out of the seal. Blot off pooled blood with paper towels, trim away bloodshot meat, and let the portions sit in the fridge or the freezer until they're firm.
Step by step
- Keep the meat cold the whole way. Work in batches and leave the rest in the fridge or a cooler on ice.
- Portion and blot. Cut to package size and blot the surfaces dry.
- Pre-freeze 1-2 hours. Spread the portions on a tray in the freezer. FoodSaver's manual says pre-freezing meat for 1-2 hours helps retain the juice and shape and gives a better seal; Weston's says the same; NESCO's says to partially freeze meats.
- Cut the bag long enough. NESCO's rule for roll bags: enough material for the item plus an additional 3 inches. That headspace keeps juice farther from the seal.
- If you can't pre-freeze, add a paper towel. FoodSaver's manual: place a folded paper towel between the meat and the top of the bag, below the seal area, and leave it in the bag to absorb juice during sealing.
- Keep the bag mouth clean and flat. Don't let the open end touch anything wet (NESCO), wipe the inside top of the bag, and smooth out wrinkles along the seal line (NESCO's VS-22LB guide).
- Pick the right mode. Moist, Liquid or Double seal if your sealer has one (details below).
- Watch the bag and seal early if you have to. If liquid starts moving toward the mouth, stop the vacuum and seal: Weston's Manual Seal, FoodSaver's Seal button (it stops the vacuum and seals immediately).
- Empty and wipe between batches. FoodSaver says to empty the drip tray after each use; NESCO says to wipe excess liquid out of the vacuum chamber after each use.
- Freeze flat, in one layer. FSIS says to spread new packages out in a single layer and stack them only once frozen solid; a food 2 inches thick should freeze completely in about 2 hours.
When a wet seal goes wrong
| What you see | Likely cause | What the manuals say to do |
|---|---|---|
| Bag loses vacuum after sealing | Wrinkles, crumbs, grease or liquid along the seal | Wipe the inside top of the bag and smooth it along the sealing element, then reseal (NESCO VS-22LB) |
| Chamber sealer vacuums but won't seal | Liquid or moisture in the seal area | Clean and dry the seal area and try again (Avid Armor USV20) |
| Sealer shuts off mid-session | Overheating, or a full drip tray on the FoodSaver | Empty the tray; if overheated, wait 20 minutes (FoodSaver) or 15 minutes (NESCO) |
| Bag melts at the seal | Seal time too long or a hot sealing element | Cut seal time a second at a time (Avid Armor); let the element cool several minutes (NESCO) |
| Pouch balloons in a chamber sealer | Food too warm, giving off vapor | Seal the meat cold (Avid Armor USV20) |
Cut off a failed seal and reseal above it if the bag is long enough; that's one more reason for the extra headspace in step 4.
What moist, liquid and double-seal modes actually do
The names sound alike, but the manuals describe different mechanisms. On the NESCO VS-12, Moist is a single seal with a longer heat-sealing time, and Double lays down two seals for foods with very high moisture. The NESCO VS-22LB adds a dedicated Liquid mode (its LiquidLock) that, per NESCO's copy, slows liquid movement during sealing. The FoodSaver V4400 switches to its moist setting on its own when its sensors detect liquid in the drip tray. Anova's Pro sealer describes its wet function as low-pressure suction with a double seal.
So there are two approaches: seal hotter or twice so the bar can push through a little moisture (NESCO's Moist and Double), or pull more gently so less liquid moves (the VS-22LB and Anova's wet setting). Neither replaces pre-freezing; they give you margin when a package is wetter than you'd like.
When to use a chamber sealer instead
If most of your trim is wet, or you want to seal stock, chili or marinated meat without freezing it first, a chamber sealer removes the problem instead of managing it. It evacuates the whole chamber with the pouch inside, and Avid Armor's description of its USV20 is that the liquid is never pulled toward a suction port. The one rule to learn: seal cold. The USV20 manual says high food temperatures create vapor that inflates the pouch, and Avid's tips for its oil machines say liquids should be at room temperature or cooler. We weigh the two machine types in chamber vs external vacuum sealer.
Picks for this job
Sealers built for wet trim
A chamber sealer for the wettest work, and the two external sealers here with the most moisture handling built in.
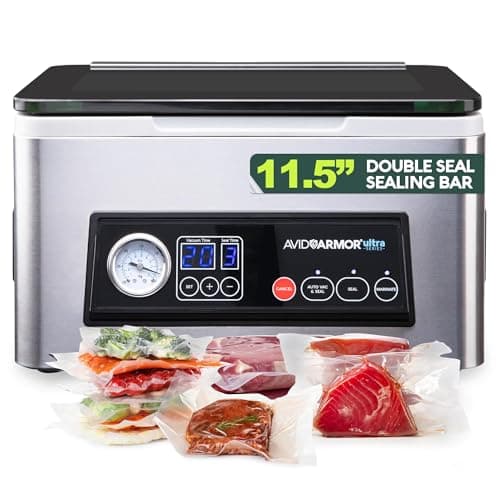
Best for wet meat
Avid Armor USV20 Chamber Vacuum Sealer
Chamber design: liquid isn't pulled toward the pump, so wet trim seals without pre-freezing.
$319.00Amazon#ad · Price as of Sep 19, 2026 · Affiliate disclosure for the link to Avid Armor USV20 Chamber Vacuum Sealer
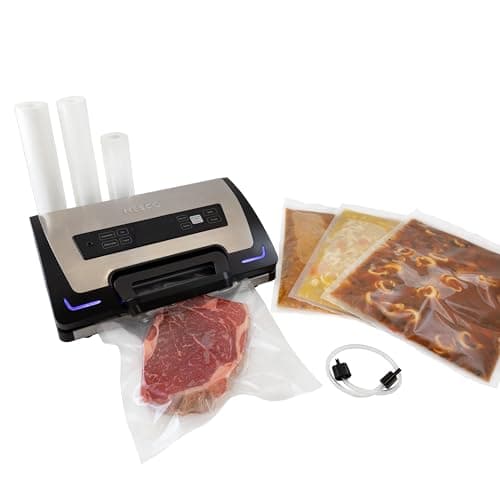
Best for wet trim, 1-2 deer
NESCO VS-22LB Premium Vacuum Sealer (LiquidLock)
Dedicated Liquid mode and a drip tray; mind the one-cycle-every-two-minutes rule.
$239.99Amazon#ad · Price as of Sep 19, 2026 · Affiliate disclosure for the link to NESCO VS-22LB Premium Vacuum Sealer (LiquidLock)
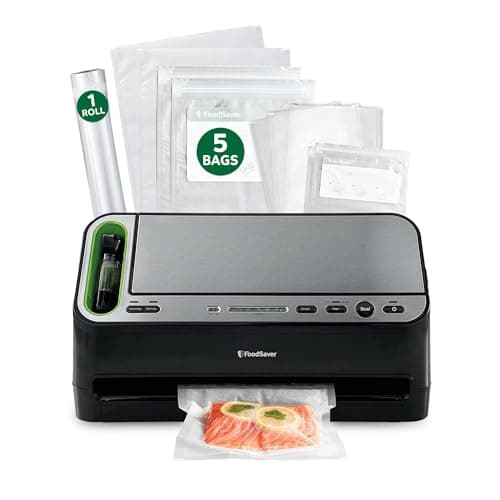
Best for 1-2 deer, hands-off
FoodSaver V4400 2-in-1 Vacuum Sealer
Detects moisture and switches modes on its own; drip tray catches overflow.
$234.99Amazon#ad · Price as of Sep 19, 2026 · Affiliate disclosure for the link to FoodSaver V4400 2-in-1 Vacuum Sealer
After the seal
Don't be alarmed if sealed venison darkens. FoodSaver's manual notes that beef may appear darker after vacuum sealing because oxygen has been removed, and that this is not a sign of spoilage; Avid Armor's manual says the same of beef and other proteins.
When you thaw it, FSIS lists three safe ways: in the refrigerator, in cold water in a leak-proof bag (an intact vacuum bag qualifies), changing the water every 30 minutes and cooking immediately, or in the microwave, again cooking immediately. How long the packages keep in the freezer, by cut, is in how long vacuum-sealed meat lasts, and the wider packaging routine, including when freezer paper is the better wrap, is in how to package deer meat for the freezer.
Questions
Frequently asked
Can you vacuum seal meat with blood in it?
Should I rinse deer meat before vacuum sealing?
Why is my vacuum sealer sucking liquid into the machine?
Do you have to freeze meat before vacuum sealing?
Why did my vacuum-sealed venison turn dark?
Keep going down the chain
Related
- Chamber vs external vacuum sealerWhether wet trim is reason enough to switch.
- How to package deer meat for the freezerThe full packaging routine, cut by cut.
- Best chamber vacuum sealersMachines that seal liquids without pre-freezing.
- How long vacuum-sealed meat lastsUSDA freezer times by cut.
- Best vacuum sealers for wild gameSealers ranked for a whole-deer session.
Receipts
Sources
- FoodSaver V4400 Series owner's manual (Sunbeam / Newell Brands PDF)
- Weston Pro-2100 / Pro-2300 owner's manual (models 65-0101 / 65-0201), PDF hosted on Amazon — the most recent Pro-2300 manual we could fetch
- NESCO VS-12 Deluxe Vacuum Sealer Care/Use Guide (PDF)
- NESCO VS-22LB Premium Liquid Block Vacuum Sealer Care/Use Guide (PDF)
- Amazon listing, manufacturer-supplied copy — NESCO VS-22LB
- Amazon listing, manufacturer-supplied copy — Anova Precision Vacuum Sealer Pro (ANVS02-US00)
- Avid Armor Ultra Series USV20 user manual (PDF linked from Avid Armor's help center)
- Avid Armor — USV20 Chamber Vacuum Sealer product page
- Avid Armor — Oil Chamber Vacuum Sealer Tips & Tricks (Guide Series GS41 / GS53)
- USDA Food Safety and Inspection Service — Freezing and Food Safety (includes the 0 °F freezer storage chart)
We haven't bench-tested this gear and we don't pretend to. Specs come from the maker's own pages, manuals and maker-supplied listing copy (labeled as such); food-safety figures from USDA and university extension publications; yield from the Ohio Division of Wildlife; prices live from Amazon. Where a figure isn't published, we say so. Read the full method.