Home Processing ◆ Guide
How to Process a Deer at Home, Stage by Stage
Five stages from the gambrel to the freezer, the temperatures that keep the meat safe, and the tools that make each stage go faster.
We earn a commission if you buy through our links, at no extra cost to you. It never decides the ranking — the method is published · Affiliate disclosure
Processing a deer at home comes down to five stages: hang and skin, quarter, debone, trim, then grind and package. Keep the meat below 40°F the whole way, per Penn State Extension, clean your knife between cuts, and check your state's carcass-transport and chronic wasting disease (CWD) rules before you move or cut the deer.
- Hang and skin. Hoist the deer on a gambrel, remove the hide and get the carcass cold.
- Quarter. Take off the shoulders and hindquarters, then the backstraps and tenderloins.
- Debone. Separate each quarter into its muscles along the natural seams.
- Trim. Remove silver skin, fat, hair and bloodshot meat.
- Grind and package. Grind the trim cold, wrap or vacuum-seal every cut, label it and freeze at 0°F.
This guide is written for the hunter who has watched it done, or done it once with help, and wants a clean order of work and the right tools. The food-safety numbers come from university extension services, cited inline. If it's your very first deer, having someone experienced beside you for the quartering is worth more than any tool on this page.
Before you start: cold and legal
Two more habits from Penn State Extension carry through every stage below: wear disposable gloves while handling the animal, and clean your knife frequently between cuts with clean water, pre-moistened wipes or alcohol swabs so you don't drag bacteria into the meat.
Stage 1: Hang and skin
Hanging the deer by its hind legs on a gambrel puts it at a working height and lets it cool evenly. The average field-dressed whitetail in Ohio DNR's sample weighed 107.56 lb, well inside the 700 lb rating Highwild lists for its 4:1 pulley hoist, and a self-locking pulley like that one lets one person lift and hold the deer. Hang it from a beam or limb that can take the load, not a gutter bracket.
Whether the hide comes off now is a trade-off. Penn State Extension says removing it right away speeds cooling, while leaving it on protects the meat during transport and aging. It adds that aging with the hide on at 32-38°F for two to three days minimizes shrinkage. If you can't hold that temperature range, skip the aging and move straight to processing once the carcass is cold.
A skinning knife does this stage, and a gut-hook helps if you field dress. Work from the hind legs down, pulling the hide as you cut rather than cutting through it, and keep hair off the meat. The processing kits in our deer processing kit roundup all include a skinner.
Stage 2: Quarter
Quartering turns one large carcass into pieces that fit a cooler or a fridge shelf, which the University of Arkansas Cooperative Extension recommends for faster cooling. The front shoulders come off with a knife, cutting along the seam between the shoulder blade and the ribs. The backstraps run along both sides of the spine, and the tenderloins sit inside, beneath it. The hindquarters come off at the hip, either with a knife through the joint or with a saw.
That's the only point where a saw is optional rather than unnecessary. If you want bone-in chops, rib sections or shanks, you'll saw; if you bone out, a knife handles all of it. Our meat saw roundup covers when a 22 in butcher saw is worth owning.
Put each quarter into a clean, cold container as it comes off. A food-grade meat lug rated to 50 lb, like LEM's heavy-duty lug, holds most of a quarter with room to work; at the Ohio DNR average of 52.19 lb of meat per deer, two lugs hold the finished meat from one deer.
Stage 3: Debone
Deboning is where most of the hours go. Each quarter is a set of muscles wrapped in thin membrane, and they separate along those seams with far less cutting than you'd expect. Follow the seam with the tip of a boning knife, lift the muscle away, and repeat. The big hindquarter muscles become roasts, steaks and jerky; the shoulder, neck, shank and rib meat usually goes to the grinder.
The tool that makes this stage fast is a 6 in curved semi-stiff boning knife, which has enough spine to work around the joints and enough give to follow a seam. Our boning knife guide explains the choice. Sort as you go: one lug for steaks and roasts, one for jerky slabs, one for grinder trim. If you're planning jerky, set the large, even hindquarter muscles aside before anything goes to the grinder pile.
Stage 4: Trim
Trimming is fiddly, and it's the stage worth slowing down for. Remove the silver skin (the tough, shiny membrane on the outside of many muscles), tendons, hair and fat. Penn State Extension also says to remove all visible dirt, feces, hair and bloodshot areas. A flexible blade follows a flat membrane better than a stiff one, which is why a second, more flexible boning knife earns its place at this stage.
Trim for the grinder can be rougher than trim for steaks, but it still needs the silver skin and sinew off, because that's what wraps a grinder's knife and clogs the plate. If you plan to add pork or beef fat to the grind, weigh the trim first so you can work out the ratio.
Stage 5: Grind and package
Grind cold. Meat and grinder parts that stay near refrigerator temperature grind cleanly; warm meat smears. Our how to grind deer meat guide covers the grind itself, step by step.
For packaging, the University of Arkansas Cooperative Extension recommends moisture- and vapor-resistant packaging, wrapped tightly to remove excess air. Vacuum-seal bags and tightly wrapped freezer paper both fit that description. Label every package with the cut and date. Penn State Extension says properly handled game meat stored in a freezer at 0°F will last up to a year or so. Our guide to packaging deer meat for the freezer goes further.
As for how much you'll end up with: Ohio DNR weighed 115 deer from the 2017 gun season and found an average of 107.56 lb field-dressed became 52.19 lb of venison, a 48.52% yield. Antlered deer averaged 62.51 lb and antlerless deer 45.05 lb. Your deer may differ; the same source notes that size, shot placement and butchering skill all change the number. Our deer yield guide breaks it down.
What to look for in the gear
Each stage has one tool that decides how long it takes. For skinning and boning, it's a set of knives with a skinning blade, a boning blade around 6 in and a butcher blade of 8 in or so, plus a way to keep them sharp. For bone cuts, it's a frame saw long enough for the stroke, with a tension lock and replaceable blades. For keeping meat cold and sorted, it's food-grade lugs with a stated capacity. And for grind, it's a grinder sized to your season rather than your first deer. These four fit a first home setup.
Picks for this job
The gear for a home breakdown
One pick per stage: a complete knife kit, a butcher saw for bone-in cuts, lugs to keep the meat cold and sorted, and a grinder for the trim.
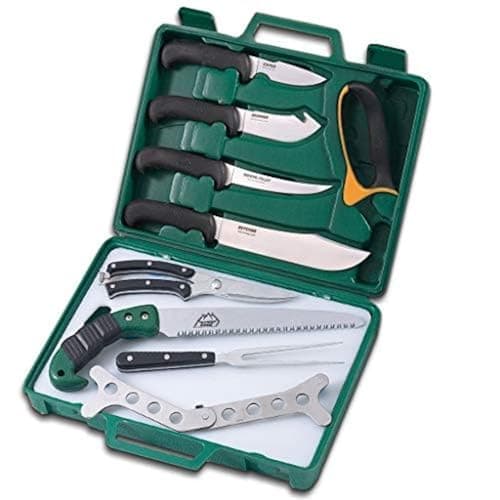
Best complete kit, any season
Outdoor Edge Game Processor PR-1 12-Piece Kit
Stages 1-4: skinning, boning and butcher knives plus a 10.2 in field saw in one case.
$67.95Amazon#ad · Price as of Sep 19, 2026 · Affiliate disclosure for the link to Outdoor Edge Game Processor PR-1 12-Piece Kit
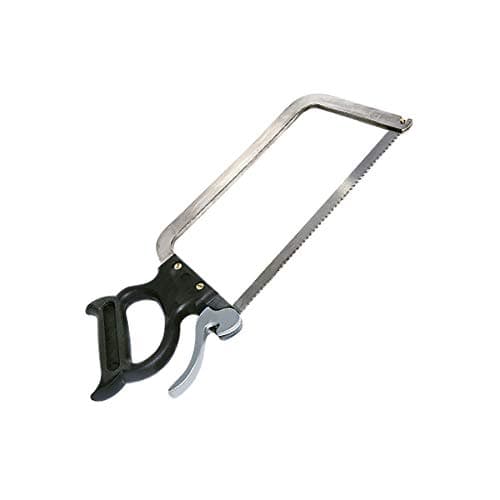
Best meat saw for most hunters
Weston 22 in Butcher Meat and Bone Saw (47-2201)
Stage 2: a 22 in stainless saw for bone-in chops, shanks and ribs. Skip it if you bone out.
$53.95Amazon#ad · Price as of Sep 19, 2026 · Affiliate disclosure for the link to Weston 22 in Butcher Meat and Bone Saw (47-2201)
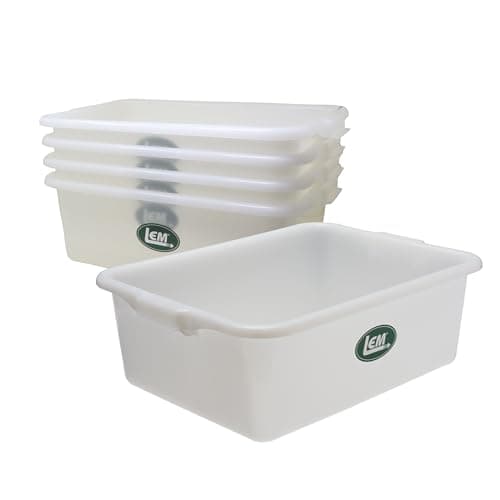
Best for 3-5 deer
LEM Heavy Duty Meat Lugs, 5-Pack
Stages 2-5: five food-grade lugs rated to 50 lb each, room to sort cuts and trim.
$91.99Amazon#ad · Price as of Sep 19, 2026 · Affiliate disclosure for the link to LEM Heavy Duty Meat Lugs, 5-Pack
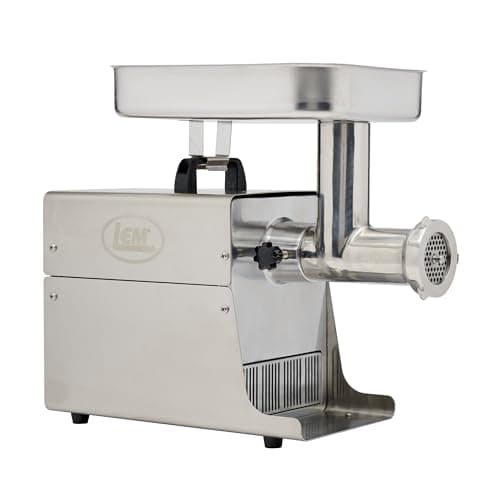
Best for 1-2 deer
LEM BigBite #8 Electric Meat Grinder
Stage 5: an electric #8 grinder for the trim. Match the size to your season with our sizes guide.
$395.99Amazon#ad · Price as of Sep 19, 2026 · Affiliate disclosure for the link to LEM BigBite #8 Electric Meat Grinder
From one deer to a full season
One deer is manageable with a knife kit, a few lugs and a small grinder. Three to five deer, about 157-261 lb of meat at the Ohio DNR average, is where the bottlenecks move to the grinder, the sealer and the freezer. Our 3-5 deer setup lays out one pick per stage for that tier, with links up and down to the 1-2 and 6+ deer versions. If you're weighing all this against a processor's fee, the break-even math is in the FAQ below.
Questions
Frequently asked
How long should a deer hang before processing?
What tools do I need to process a deer at home?
How much meat do you get from a deer?
Can I process a deer without a saw?
Is it cheaper to process your own deer?
Keep going down the chain
Related
- Best deer processing kitsKnives for every stage in one case
- Best meat saws for home useWhen a saw is worth owning
- How much meat from a deerOhio DNR yield, explained
- How to grind deer meatStage 5, in detail
- How to package deer meat for the freezerWrapping and labeling
- DIY vs processor costThe break-even math
Receipts
Sources
- Penn State Extension — Proper Field Dressing and Handling of Wild Game and Fish (Catherine Nettles Cutter, Ph.D.)
- University of Arkansas Division of Agriculture Cooperative Extension Service — Field-to-Table: Essential Tips for Safe Deer Processing
- CWD Alliance (cwd-info.org) — State and Province Carcass Import Regulations
- Ohio Department of Natural Resources, Division of Wildlife — Venison Meat Yield (115 deer, 2017 gun season) [PDF]
- Amazon listing, manufacturer-supplied copy — LEM Heavy Duty Meat Lug 360
- Amazon listing, manufacturer-supplied copy — Highwild game hoist and gambrel HOTS-A312
We haven't bench-tested this gear and we don't pretend to. Specs come from the maker's own pages, manuals and maker-supplied listing copy (labeled as such); food-safety figures from USDA and university extension publications; yield from the Ohio Division of Wildlife; prices live from Amazon. Where a figure isn't published, we say so. Read the full method.